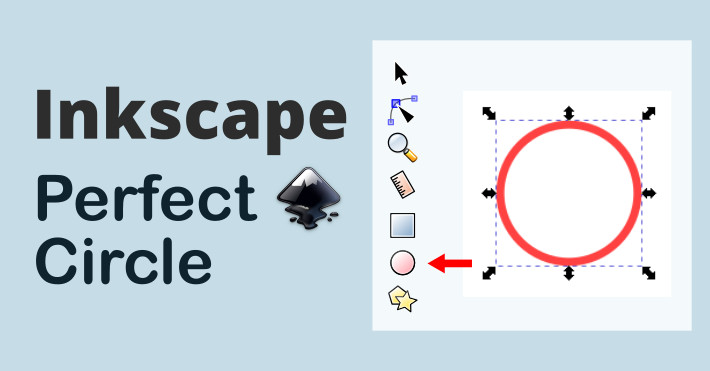
A very common question I get from beginners is this:
How do you create a perfect circle in Inkscape?
In fact, creating a perfect circle in Inkscape is not obvious, since you mostly rely on your mouse to draw on the vector software canvas. However, creating a perfect circle is simple if you can memorize a few simple keyboard combinations.
So:
How do you create a perfect circle in Inkscape? To create a perfect circle in Inkscape, you have to press on the CONTROL (Ctrl) key as you click and drag on the canvas with the Circles, Ellipses, and Arcs Tool selected.
But there’s a little more to it.
Keep reading to learn a few more tricks for creating not only prefect circles, but also perfects squares, and triangles.
Let’s begin.
MY NEW ONLINE COURSE
Thinking Like a Designer
Learn my proven method to finally understand the rules of any design and jumpstart your path to become an effective graphic designer

Create a Perfect Circle In Inkscape
Overview: Select the Circles Tool, press the Ctrl key, and click and drag on the canvas.
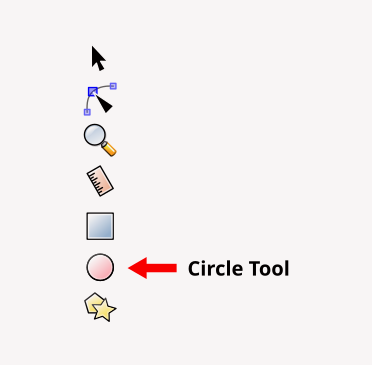
Step 01: Select the Circles, Ellipses, and Arcs Tool
On the main toolbar, select the Circles Tool:
Step 02: Press on the CONTROL (Ctrl) key
This part is as easy as it sounds. Just press the Ctrl key after you have selected your circles tool.

Now, remember this pneumonic, as it will be useful for many other Inkscape applications:
“Ctrl controls.”
This means that the Ctrl key is often used to make controlled moves in Inkscape. For example, if you draw a line using the Bezier Tool, it will “lock” the mouse to help your create a straight line or stroke.
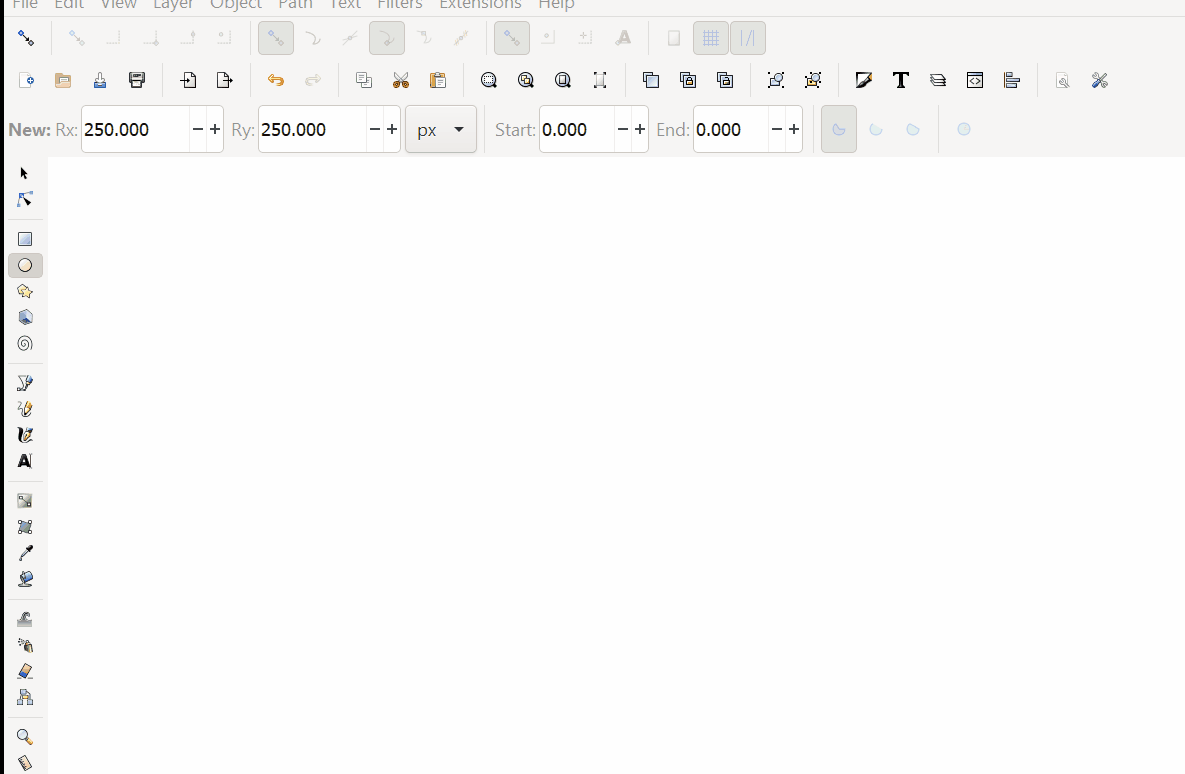
Step 03: Click and Drag on the Canvas to Draw a Perfect Circle
Making sure that you are pressing the Ctrl key first, click and drag on the canvas to create your perfect circle, like so:

Notice that by only pressing on the Ctrl key, your circle is actually drawn from the corner from which your are dragging.
However, if you want your circle to be drawn from its very center, you need to press both Ctrl and the Shift keys at the same time:
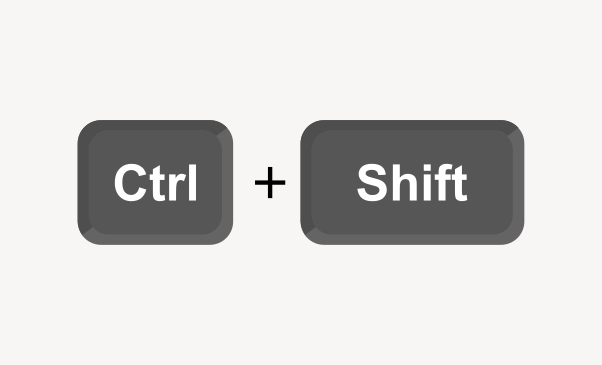
This is the result of pressing both Ctrl + SHIFT and dragging a circle on the canvas:
Notice how the circle now grows from its center and not from one of its edges. This can be very useful for creating something like circles within circles, as in this concentric circles logo tutorial.
Cool. Now, do you also want to create prefect squares and triangles in Inkscape?
Keep reading.
How to Create a Perfect Square in Inkscape
The process for creating a perfect square in Inkscape is the same as creating a perfect circle, as discussed above.
First, select the Rectangles and Squares Tool. Then, press on the Ctrl key. Finally, click and drag on the canvas.
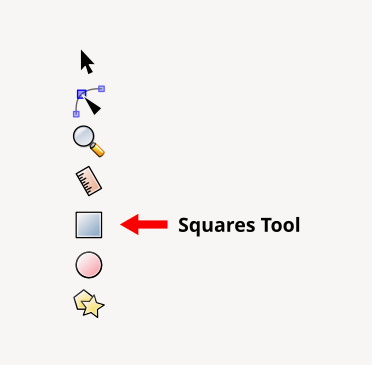
Step 01: Select the Squares Tool
To create a perfect square in Inkscape, first select the Rectangles and Squares Tool:
Step 02: Press on the CONTROL (Ctrl) key
Again, press the Ctrl key.
Remember:
The Ctrl key is often used to “lock” or “control” the movement and transformation of vector elements and objects.
Step 03: Click and Drag on the Canvas to Draw a Perfect Square
Click and drag on the canvas to create your perfect square, like so:
As with the previous example, if you press on the Ctrl and Shift keys at the same time, you will be able to draw your perfect square from its very center.
How to Create a Perfect Triangle in Inkscape
Creating a perfect (equilateral) triangle in Inkscape is easy.
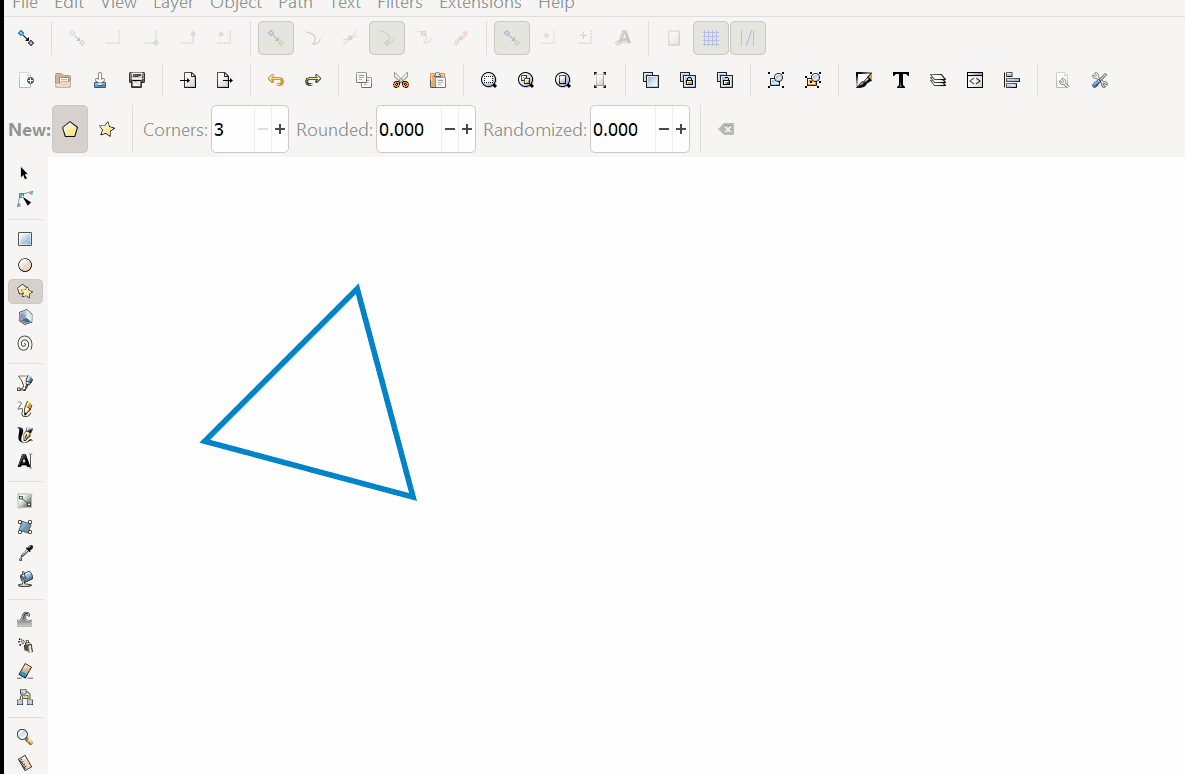
To create a perfect, equilateral triangle in Inkscape, select the Stars and Polygons Tool, click on the New Polygon button, and decrease or increase the polygon’s number of corners to three (3):
If the base of your triangle is not horizontally aligned, do the following:
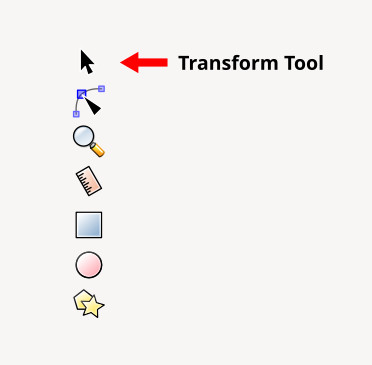
Select your Transform Tool:
Now, click once on your triangle. Notice how the orientation of the arrows around the triangle point outward. This means you can transform the size and shape of your object.
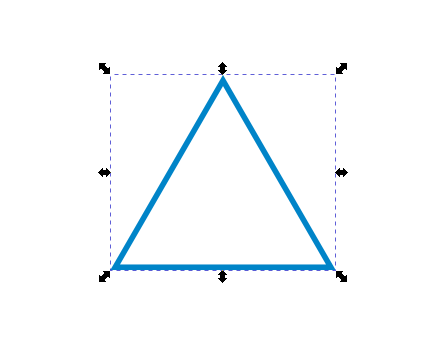
Now, click the object once more time. Notice how the orientation of the arrows changes in a circular way. Now you can transform your object by rotating it.
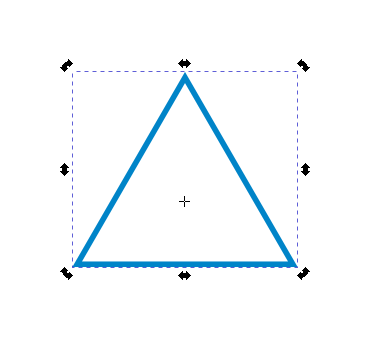
With this second transform option selected, let’s rotate our triangle by dragging on one of its edges in a rotating motion.
PRO TIP: Remember I said that Cntrl controls?
Rotate the object while pressing the Ctrl key. This will rotate the object in a “controlled” way on 15 degree intervals. This way, you can perfectly align the triangle on its horizontal axis, like this:
Conclusion: Creating Perfect Circles, Squares, and Triangles in Inkscape is Easy
There you have it, three simple methods for creating perfect geometrical shapes in Inkscape.
Remember: The key is to use the Ctrl key to create your shapes. This way, you can “lock” the creation of your object to create a perfect shape.
Did you find this explanation useful? Leave a comment below and let me know!
MY NEW ONLINE COURSE
Thinking Like a Designer
Learn my proven method to finally understand the rules of any design and jumpstart your path to become an effective graphic designer

About the Author:
Ruben Ramirez teaches digital media in college and started Self-Made Designer to share his knowledge of graphic design. He is also a self-taught designer.