In this advanced Inkscape logo tutorial, I show you step-by-step how to create a complex logo using a grid construction process.
Specifically, we will recreate the Woolmark logo, by Italian designer Franco Grignani.
In this tutorial, you will learn about:
- Logo grid construction process
- Boolean operations
- Geometric logo design
BONUS: Download this advanced Inkscape logo tutorial in PDF at the bottom of the page so you can work at your own pace.
Learn More About Logo Construction With These Tutorials and Resources:
Powell Peralta Logo Vector Tutorial [with Download]
MY NEW ONLINE COURSE
Thinking Like a Designer
Learn my proven method to finally understand the rules of any design and jumpstart your path to become an effective graphic designer

MY NEW ONLINE COURSE
Thinking Like a Designer
Learn my proven method to finally understand the rules of any design and jumpstart your path to become an effective graphic designer
Step 1
Overview:
- Create layers
- Set the grid
- Create an equilateral triangle
- Align triangle
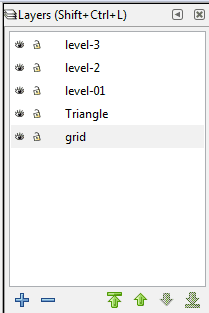
a. Create the layers
First, create four layers using the Layers dialog (Layer > Layers). Name the layers, from bottom to top, like so: Triangle, Level 1, Level 2, Level 3. This will help us organize our work and deal with the complexity of the design as we move forward.
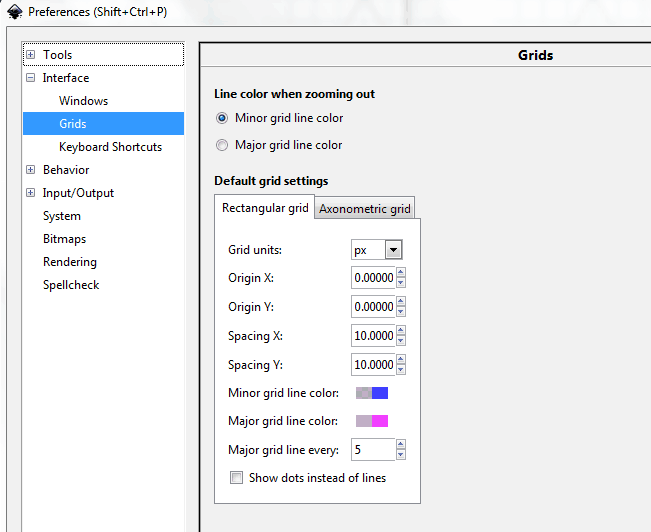
b. Set the grid
Create a grid for the document by going to View > Page Grid. Be sure to set the grid size (spacing) large enough so you can easily work with its scale.
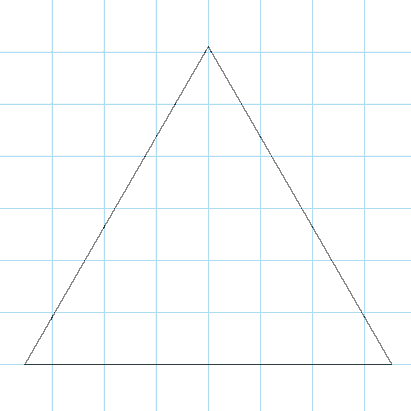
c. Create a triangle
Now, create an equilateral triangle, using the Stars and Polygons tool ![]() , by setting its corners to “3. ” Move the triangle to the Triangle layer by selecting Layer > Move Selection to Layer Above or Below, depending the layer on which the triangle was created.
, by setting its corners to “3. ” Move the triangle to the Triangle layer by selecting Layer > Move Selection to Layer Above or Below, depending the layer on which the triangle was created.
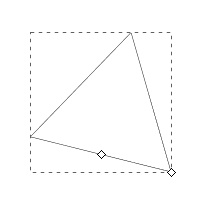
d. Align the triangle
Select the triangle, align its tip to a grid intersection and, pressing the SHIFT and CTRL keys *, enlarge (drag) the triangle so that its height is equal to an even number of squares (mine is 6 “grid squares” high). You may enable the snapping tool for more accuracy.
* The SHIFT key makes the object scale from its center of rotation, while the CTRL key makes it scale symmetrically.
Step 2
Overview:
- Create a perfect circle
- Duplicate and position circles
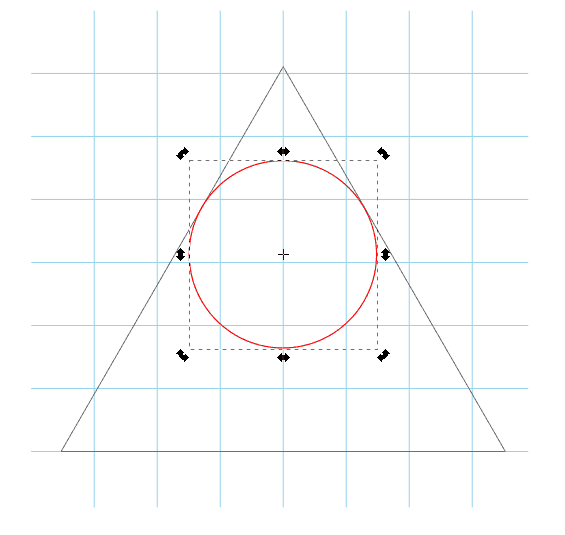
a. Create a circle
Locate the center of the triangle in terms of its height: In my case, it’s 6 “grid squares” high, so its center intersection lies on square 3.
Position the cursor slightly upward off center, as shown. This will make our rendition more accurate in terms of the original logo.
Select the Circles tool.
While pressing the SHIFT and CTRL keys, enlarge (drag) the circle so that it becomes a perfect circle. Make sure the edges of the circles touch the edges of the triangle.
Convert the circle to a path by selecting Path > Object to Path.
b. Duplicate and position circles
Duplicate the circle (CTRL + D keys or Edit > Duplicate). Move the duplicate to the lower left side. Press the CTRL key to drag the circle to the bottom, then press CTRL to drag to left, until it touches the left and bottom edges of the triangle.
Duplicate the lower left circle and drag to the right, using the CTRL key.
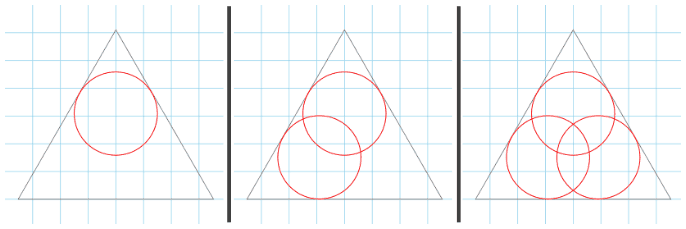
Now you have three cicles within a triangle.
Step 3
Overview:
- Duplicate upper left side circles
- Interpolate circles
- Move selection to layer above
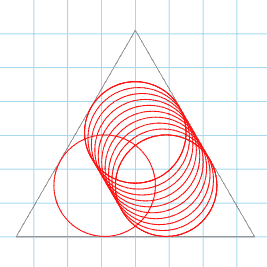
a. Duplicate upper left side circles
We will now create the circles that will make up the black crescents of the design.
Select the lower left circle and, pressing the SHIFT key, also select the upper circle (the order of selection is important).
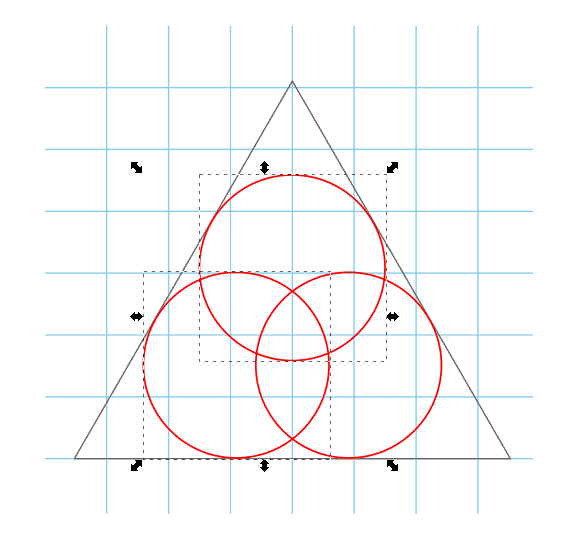
b. Interpolate circles
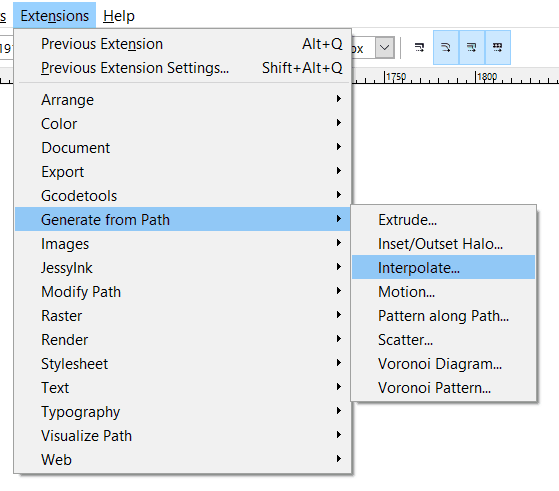
Go to Extensions > Generate from Path > Interpolate.
In the dialog, select “Duplicate endpaths” and be sure to set interpolation steps to 8. This is so because the extension will “fill” the space between the circles with duplicates of the same circles. If you look at the Woolmark logo, each side is composed of 10 circles.
c. Move selection to layer above
The interpolated circles will be grouped, with a total of 10 objects. Select the group, then move the selection to the layer named “Level 1.” Turn off the layer (in the Layers dialog, click on the little eye icon to close it).

Step 4
Step overview:
- Repeat process on step 3 for right side
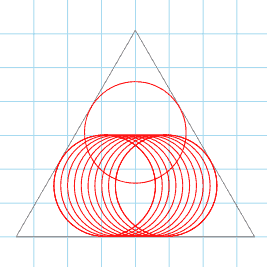
a. Repeat interpolation for each side
Select the upper and lower circles by pressing the SHIFT key.
Repeat the interpolation process.
Move the selection to the layer named “Level 2” and turn off.
Step 5
Step overview:
- Repeat process on steps 3 and 4 for bottom side
- Delete original circles
a. Repeat interpolation process for bottom side of triangle
Select the lower right and left circles by pressing the SHIFT key.
Repeat the interpolation process.
Move the selection to the layer named “Level 3” and turn off.
b. Delete original (guide) circles
Delete the three original guide circles before continuing with the next step.
Step 6
Step overview:
- Apply the Boolean operation “Difference”
- Fill black and remove stroke to create crescents
- Repeat to create all the crescent shapes
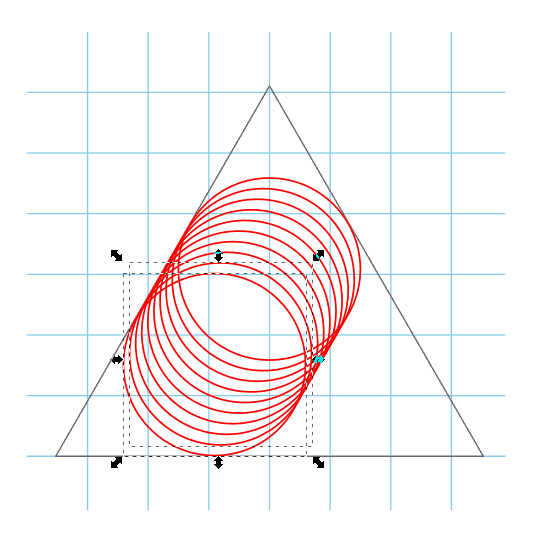
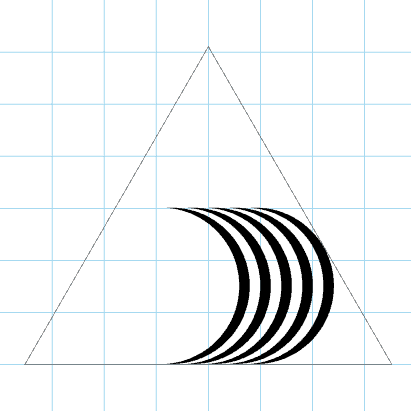
a. Apply the Boolean operation “Difference”
Start with layer “Level 1”.
Turn on the layer and ungroup the interpolated circles by selecting them and pressing the CTRL and U keys. You now have 10 separate circle objects.

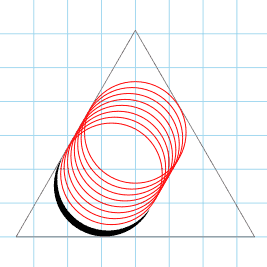
b. Fill and remove stroke to create crescents
Create the crescents from the circular grid.
Select the outermost circle and the circle that follows.
Apply Path > Difference. Apply black fill and remove stroke (Object > Fill and Stroke).
You now have your first crescent.
c. Repeat for creating the other crescents
Repeat with all crescents of that side. You now should have something that looks like this:
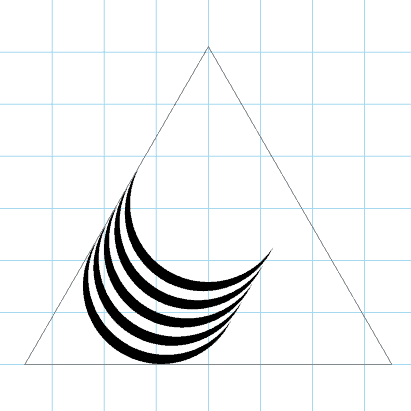
d. Repeat crescent creation on remaining sides
Turn off the layer and repeat with the remaining two sides:
Step 7
Step overview:
- Use the eraser tool to clean paths
- Turn on all layers
- Select crescents with protruding tips
- Erase tips with the Eraser tool
- Repeat for all sides
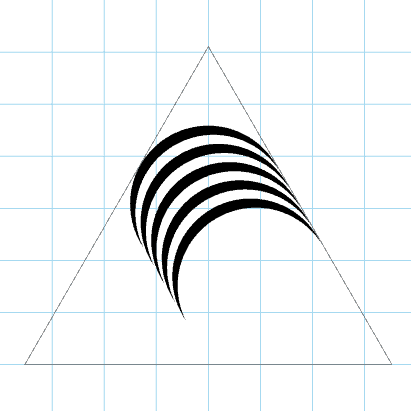
a. Turn on all layers
For the final step, turn on all layers.

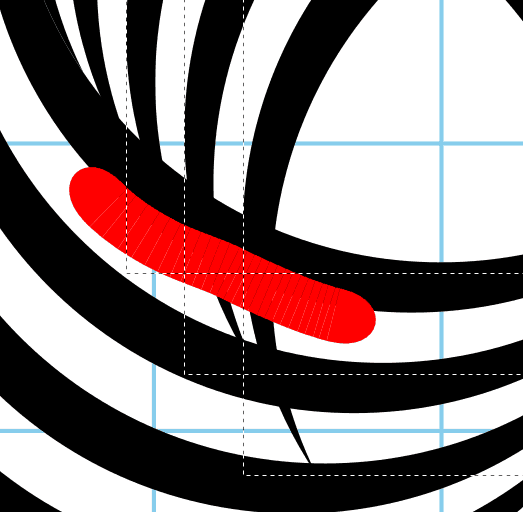
b. Select crescents with protruding tips
Select the crescents whose tips protrude unto the opposite crescent set.
c. Erase tips with the Eraser tool
Select the Erase tool. At the top of the page, in Mode, select “Cut out from object.”
Start “erasing” the protruding crescent tips by passing the tool just to the contour of the opposite crescent. Be sure to remove all parts of the tip while the object is selected.
e. Repeat
Repeat on all sides, according to the fold of the original Woolmark logo.
Turn off unnecessary layers.
DONE!
You now have recreated a version of the Woolmark logo and learned about circular grids, Boolean operations, and logo design in the process.
MY NEW ONLINE COURSE
Thinking Like a Designer
Learn my proven method to finally understand the rules of any design and jumpstart your path to become an effective graphic designer

About the Author:
Ruben Ramirez teaches digital media in college and started Self-Made Designer to share his knowledge of graphic design. He is also a self-taught designer.
Wonderful concept of designing
thank you
You’re welcome Kapil. Keep on practicing.
Thank you very much Sir, for an informative Tutorial….
Thank you for stopping by! Be safe and well!
Thank you very much for your tutorials. I’ve gained a few more concepts on how to create and organize shapes and lines.
Kris, thank you so much. Practice is key. Get yourself a project that applies these skills. What other tutorials would you like to see?
Best tutorial Can you make text logo like this 🙂
Great. That is a superb idea!
This is really appreciated that you have presented this data over here, I love all the information shared. It will be very helpful to understand the inkscape logo tutorials!! This is a lovely and informative post…
Thank you so much! Let me know if there’s a specific content you’d like me to cover.
Still I am not convinced with your reply as I am looking for your guide line as how to improve my design skill which I mentioned in my first comments. Thank you.
how could I improve my design skill in order to work in the marketplace as I am only a beginner. Thank you.
Very good tutorial, though I believe this is not a beginners tutorial but meant for intermediate learners.
I don’t want to be judgmental so forgive me for pointing out something which needs improvement…the text of the tutorial has been stretched out with (white spaces) in between, which requires too much scrolling. Reducing the line spacing and removing the gaps would make a huge difference to the tutorial.
Have a good day.